Guest Post - Snowflake Stamps for Winter!
We're so excited to have a guest post for you today by Stephanie Whittle from Boy Mama Teacher Mama! An elementary teacher and mama to two young boys, Stephanie's passion is coming up with unique and inspiring teaching ideas as she strives to see the world from her boys' point of view.
Today she's sharing a fun winter craft that we know your little crafters will enjoy!
Snowflake Stamps for Winter

I have become a bit obsessed with creating my own rubber stamps. I first saw the idea on Mr. Printables and have since created 3 different sets of my own rubbers stamps. We made skeleton stamps for Halloween and dreidel stamps for Hanukkah. This month, we made snowflakes and snowballs for winter. Here is how we did it.
Materials
polymer eraser (as many as you need)
exacto knife (or something similar)
pen or pencil
stamp pad or paints
paper

Creating the Stamp
Draw a picture of the stamp you wish to create on the eraser using a pencil or pen. Then use the knife to carve away the background of the image. The photo below shows our snowflake stamp.

Here are three different size circles for creating a snowman.

You may notice that the stamps are not perfect. This gives each stamp an individual look. If you cared to, you could probably make the stamp more "perfect," but I personally like this look.
Using Your Snowflake Stamps
We tried both paints and stamp pads. My boys preferred the paint as it produced a bolder look than that ink from a stamp pad.

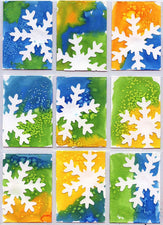
And here are a few of the pictures we created.

Next on my list? Hearts for Valentine's Day!
