- Related
-
Bulletin Board Ideas
ThemesBack To School Birthday Black History Month Christian Door Displays Dr. Seuss Inspirational Interactive Literacy Motivational Ocean Popcorn Sports Technology Weather WelcomeMonths Seasons HolidaysChristmas Easter Groundhog Day Halloween New Years Presidents' Day St. Patrick's Day Thanksgiving Valentine's DayGrade Subject All Bulletin Board Ideas
-
Crafts
GradePreschool Crafts Kindergarten Crafts 1st Grade Crafts 2nd Grade Crafts 3rd Grade Crafts Elementary Crafts Middle School CraftsHolidayChristmas Crafts Earth Day Crafts Easter Crafts Father's Day Crafts Halloween Crafts Memorial Day Crafts Mother's Day Crafts St. Patrick's Day Crafts Thanksgiving Crafts Valentine's Day Crafts Veterans Day CraftsSeason MonthJanuary Crafts February Crafts March Crafts April Crafts May Crafts June Crafts July Crafts August Crafts September Crafts October Crafts November Crafts December CraftsTheme
- Fall
- Halloween
- Preschool
- Thanksgiving
Falling for All Things Fall - Autumn Bulletin Board Idea
No reviews

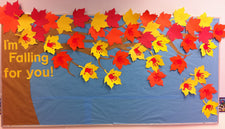
The toddler teachers at McKinley Early Childhood love getting their kiddos involved in the decoration process. This simple fall bulletin board, with adorable hand print leaves, makes a perfect backdrop for the entire season - just think of the pumpkins, scarecrows, corn stalks, and all the other fun fall items you can add along the way!
Fall Bulletin Board
- Background: Sky blue bulletin board paper.
- Title: "It's Harvest Time!", "FALL-ing Into Fall", etc.
- Border: None needed.
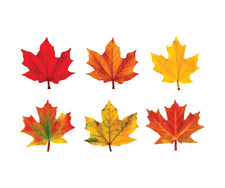
- Decoration: 1) The Tree. Freehand the tree cutout onto a piece of brown background paper or find a clip art image online to enlarge and trace using your classroom projector system. Arrange the tree on the left side of the bulletin board with its branches pointing toward the right. 2) The Leaves. Find a leaf template online, printing it onto colored card stock or creating a template to use to trace and cut leaves from construction paper/card stock. For fun, invite your kiddos to dip their hand in paint and carefully press it to a leaf cutout in order to create a print. Place the leaves on the tree branches and "eddying" down toward the bottom of the board.
As the season progresses, add other elements {perhaps some student crafts!} to fill up the board!
