He's Making His List…Santa Classroom Bulletin Board Idea
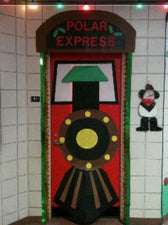
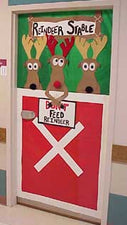
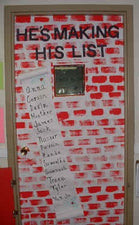
 We featured a similar door display, but thought it might be nice to see the theme adapted for a classroom bulletin board display! This McKinley Early Childhood kindergarten teacher didn't disappoint! With a spectacular tissue tree, yarn bows on the presents, and a complete list of "nice" students, this bulletin board was a holiday hit!
He's Making His List... Bulletin Board
- Background: The original creator used lite blue bulletin board paper, but you might also consider using a light colored, 'muted' pattern of Christmas gift wrap or light green background paper.
- Title: "He's Making His List...Checking It Twice!"
- Border: The original creator used a red solid color trimmer, but you might also consider using a winter-themed bulletin board border or garland strung with actual lights!
-
Decoration: 1) The Santa Claus. Santa can be created with simple construction paper shapes. You'll need: 1 medium peach oval for the head, 1 large red rectangle for the body/coat, 1 large red circle cut in half for the collar, 1 medium red rectangle cut in half for the legs, 2 small red trapezoids for the sleeves, 1 small peach circle cut in half for the hands, and 8 mini ovals for the fingers (actual size will depend on the size of the hands). Here's a look at what your shape Santa will look like before adding the details.
 Create a Santa hat from red construction paper as well as two boots and a thin belt from black construction paper. The next step is to draw a face using markers or craft paint and add the cotton ball detailing. Places to add cotton balls: along the edge and at the tip of the Santa hat, around Santa's mouth creating a mustache and beard, at the edge of the sleeves, along the edge of Santa's coat, and along the hem of the pants. The last step is to add the list (and the finger ovals). 2) The List. Cut a long piece of white bulletin board paper. Script your students names down the page with black permanent marker and attach the list (along with Santa's fingers where they line up with his hands) on the board. 3) The Tree Skirt. Cut a large oval from red construction paper and mount it in the lower right corner of the bulletin board. 4) The Christmas Tree. Create the shape of a Christmas tree using brown bulletin board paper. Cut strips of tissue paper in assorted colors of green then tie a knot in the center of each strip so that it looks like a bow tie. Arrange these "ties" on the brown Christmas tree shape and attach it to the board (the tree should overlap the tree skirt so that only half of it can be seen). Add a brown construction paper trunk.
 5) The Presents. Create several gift wrapped packages. Consider using actual wrapping paper and ribbon to create packages in various shapes and sizes. For the finishing touch, once the packages have been glued to the tree skirt, add a row of cotton balls around the edge of the tree skirt and you're set!
While this bulletin board might take some extra work, it looks great and will add a festive touch to your classroom decor! Do you think it's worth it to spend some extra time on intricate decorations during the holidays or prefer more simple solutions (...because you're busy enough!)? Share your thoughts below!
 Create a Santa hat from red construction paper as well as two boots and a thin belt from black construction paper. The next step is to draw a face using markers or craft paint and add the cotton ball detailing. Places to add cotton balls: along the edge and at the tip of the Santa hat, around Santa's mouth creating a mustache and beard, at the edge of the sleeves, along the edge of Santa's coat, and along the hem of the pants. The last step is to add the list (and the finger ovals). 2) The List. Cut a long piece of white bulletin board paper. Script your students names down the page with black permanent marker and attach the list (along with Santa's fingers where they line up with his hands) on the board. 3) The Tree Skirt. Cut a large oval from red construction paper and mount it in the lower right corner of the bulletin board. 4) The Christmas Tree. Create the shape of a Christmas tree using brown bulletin board paper. Cut strips of tissue paper in assorted colors of green then tie a knot in the center of each strip so that it looks like a bow tie. Arrange these "ties" on the brown Christmas tree shape and attach it to the board (the tree should overlap the tree skirt so that only half of it can be seen). Add a brown construction paper trunk.
 5) The Presents. Create several gift wrapped packages. Consider using actual wrapping paper and ribbon to create packages in various shapes and sizes. For the finishing touch, once the packages have been glued to the tree skirt, add a row of cotton balls around the edge of the tree skirt and you're set!